

Use a one-artwork-per-entry structured report combining metadata, provenance, condition, and attachments. This format works for insurance claims, sales, loans, and estate planning because it isolates every fact an outside party needs to verify. Copy the template structure below, fill in the core fields for one piece, and export it as a standalone PDF before you scale to a full collection index.
TL;DR:
- Standardized report format emphasizes key data fields like provenance, valuation, and condition, which are crucial for insurers and buyers’ verification.
- Attachments such as high-resolution images, purchase receipts, appraisal reports, and provenance documents should be organized systematically in dedicated folders for each artwork.
- Using a simple spreadsheet is sufficient for collections under 30 pieces, but transitioning to no-code templates or specialized software improves scalability and automation.
- Accurate recording of acquisition price and current value as separate, dated fields prevents misinterpretation during claims or estate settlement.
- Professional assistance is recommended for high-value items, authentication issues, or complex legal or appraisal needs to ensure comprehensive documentation compliance.
Table of Contents
- What Belongs in a Standard Art Collection Report Format
- Core Data Fields Every Artwork Entry Needs
- What Documentation to Attach and How to Organize It
- Choosing a Format: Spreadsheet, No-Code Template, or Software
- Writing the Analysis Section and Recording Outcomes
- Common Mistakes That Undermine a Collection Report
- When to Bring in a Professional
- Templates and Guidance Ready to Use Now
- Completeness Versus Maintainability for Small Collections
- Put This Format to Work Without Building It From Scratch
- Sources
- FAQ
What Belongs in a Standard Art Collection Report Format
A usable report has eight parts, and skipping any of them is what causes insurance adjusters and buyers to ask for follow-up paperwork. The Metropolitan Museum of Art’s sample documentation templates organize artist records along nearly identical lines, which is a strong signal that this structure isn’t a shortcut. It’s the standard museums themselves rely on.
Here is the section order that works for a single-artwork report page:
- Header and metadata: report date, prepared by, collection or owner name, internal reference number.
- Artwork data: artist, title, medium, dimensions, date of creation.
- Provenance and acquisition: chain of ownership, seller, invoice number, purchase date and price.
- Condition: summary statement and a reference to the full condition report on file.
- Valuation: current value, valuation source, valuation date, currency.
- Location and movement: current location, loan history, insurance coverage status.
- Attachments: linked images, receipts, certificates, appraisal documents.
- Notes and outcomes: exhibition history, sales activity, conservation work.
Put the artwork data and provenance blocks near the top. Insurers and buyers read those two sections first, and burying them under boilerplate header text slows down every review.
For field order within the artwork data block, list artist name, then title, then medium, then dimensions (height by width by depth, in inches or centimeters, stated consistently across the collection), then creation date. That order matches how appraisers scan a page, and it’s the same sequence used in most art inventory field lists recommended for tax and insurance documentation.
Once a collection grows past 20 or 30 pieces, add a summary index. It’s a single spreadsheet page listing artwork ID, title, artist, and current value, sorted however you check the collection most often (by location, by medium, or by acquisition date). The index feeds from the same data as the individual report pages, so no field gets typed twice. Batch exporting all entries into one PDF works for annual reviews and insurance renewals; single-artwork PDFs work for sales, loans, and one-off appraisal requests.
Core Data Fields Every Artwork Entry Needs
Nine fields separate a report that satisfies an insurer or buyer from one that generates follow-up questions. Standardizing them across every entry, not just filling them in inconsistently, is what makes a collection report format usable.
- Artist name: use the artist’s full legal or professional name exactly as it appears on prior documentation, not a nickname or shortened version.
- Title: match the title on the original bill of sale or gallery label, and note “untitled” explicitly rather than leaving the field blank.
- Medium and dimensions: use consistent units and format (e.g., “oil on canvas, 24 x 36 in.”) across every record.
- Inventory ID: assign a unique accession number per piece, ideally paired with a QR code affixed to the frame or storage sleeve for fast lookup.
- Acquisition details: seller name, invoice number, purchase date, and payment method, since these are the fields an auditor or insurer checks first.
- Valuation: current value, valuation source (dealer estimate, formal appraisal, auction comparable), and valuation date, kept separate from the original purchase price.
- Provenance summary: a chronological ownership chain with supporting documents noted, and any gaps flagged rather than smoothed over.
- Condition summary: a short status line linking to the full condition report on file.
- Location and movement: current storage or display location, loan history, and current insurance status.
Never conflate historic purchase price with current value. A painting bought for $8,000 in 2015 might carry a $22,000 current appraisal. Reports that list only one number, or that blend the two without labeling which is which, create real problems during insurance claims or estate settlement. Keep both fields, dated separately, every time.
Condition notes deserve their own document rather than a paragraph crammed into the main report. A short reference line (“see condition report dated March 2026”) pointing to a full write up keeps the main entry scannable while preserving detail for anyone who needs it, including insurers evaluating how condition affects valuation.
What Documentation to Attach and How to Organize It
Every artwork entry needs a supporting file set behind it, not just the data fields. Museum-level sample documentation practices treat attachments as part of the record itself, not optional extras.
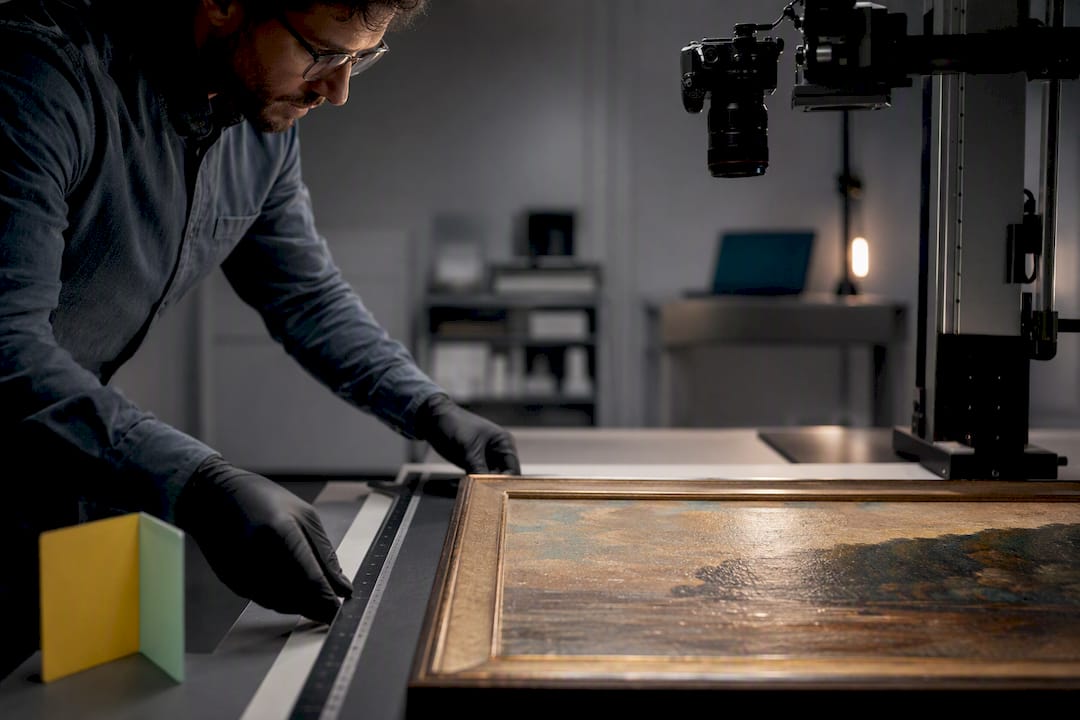
- Photographs: at least one full-view image at 300 DPI or higher, plus detail shots of any damage, signatures, or maker’s marks. Name files consistently, such as “ArtistLastName_Title_Year_Front.jpg.”
- Receipts and bills of sale: the original purchase invoice, plus any export or import paperwork if the piece crossed borders, since these documents matter for tax records and customs history alike.
- Appraisals and certificates of authenticity: formal appraisal documents with the appraiser’s credentials listed, and any certificate of authenticity issued by the artist, foundation, or gallery of record.
- Provenance documents: prior sale receipts, auction records, gallery correspondence, anything that supports the ownership chain in the main entry.
- Condition and conservation records: the full condition report plus any conservation treatment records, linked rather than duplicated into the main file.
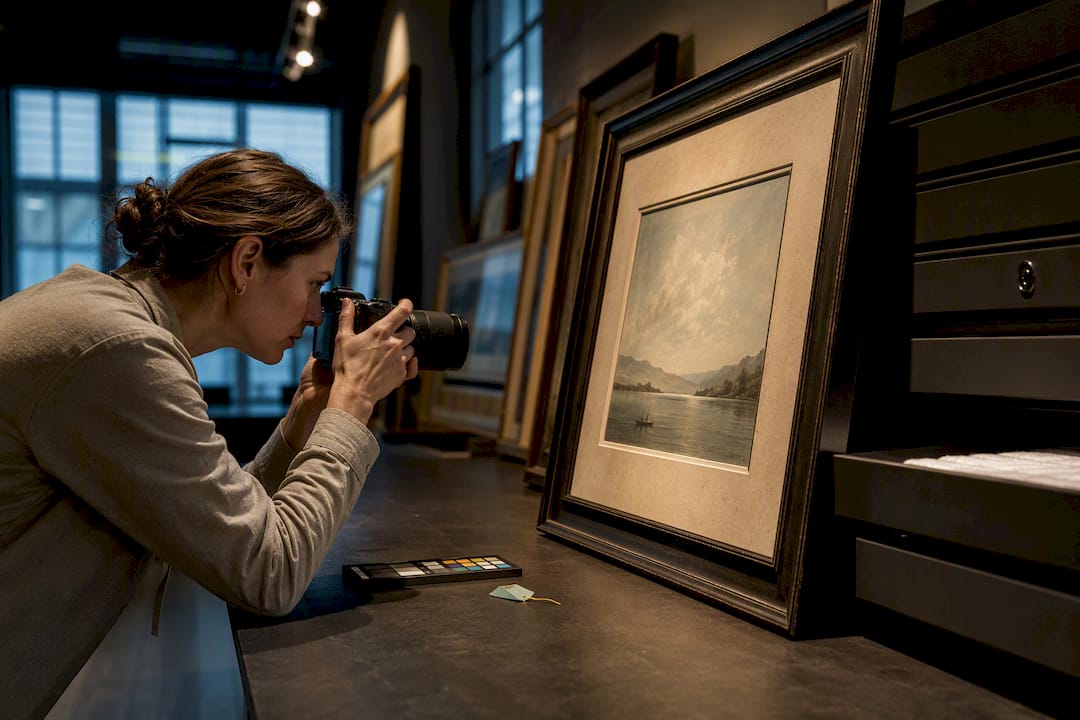
Install shots matter more than most collectors realize. A photo showing a piece hung or displayed in context helps establish provenance and can support insurance claims after a loss, since it documents the piece existed in a specific place at a specific time.
Pro Tip: Set up one cloud folder per artwork, named by inventory ID, with subfolders for images, receipts, and reports. That structure survives a software migration far better than files buried inside a single spreadsheet’s comment cells.
Back up everything in at least two locations, and one of them should not be the same platform housing your primary inventory. A dedicated collection management checklist helps confirm nothing gets missed as the file count grows.
Choosing a Format: Spreadsheet, No-Code Template, or Software
Start with a spreadsheet if the collection is under 30 pieces and you’re documenting for the first time. A basic header row covering artist, title, medium, dimensions, date, inventory ID, acquisition price, current value, and location gets you moving without any setup cost. LegalClarity’s guidance on inventory templates treats spreadsheets as a legitimate starting format, with a clear caveat: they don’t scale well once photo attachments and condition histories pile up.
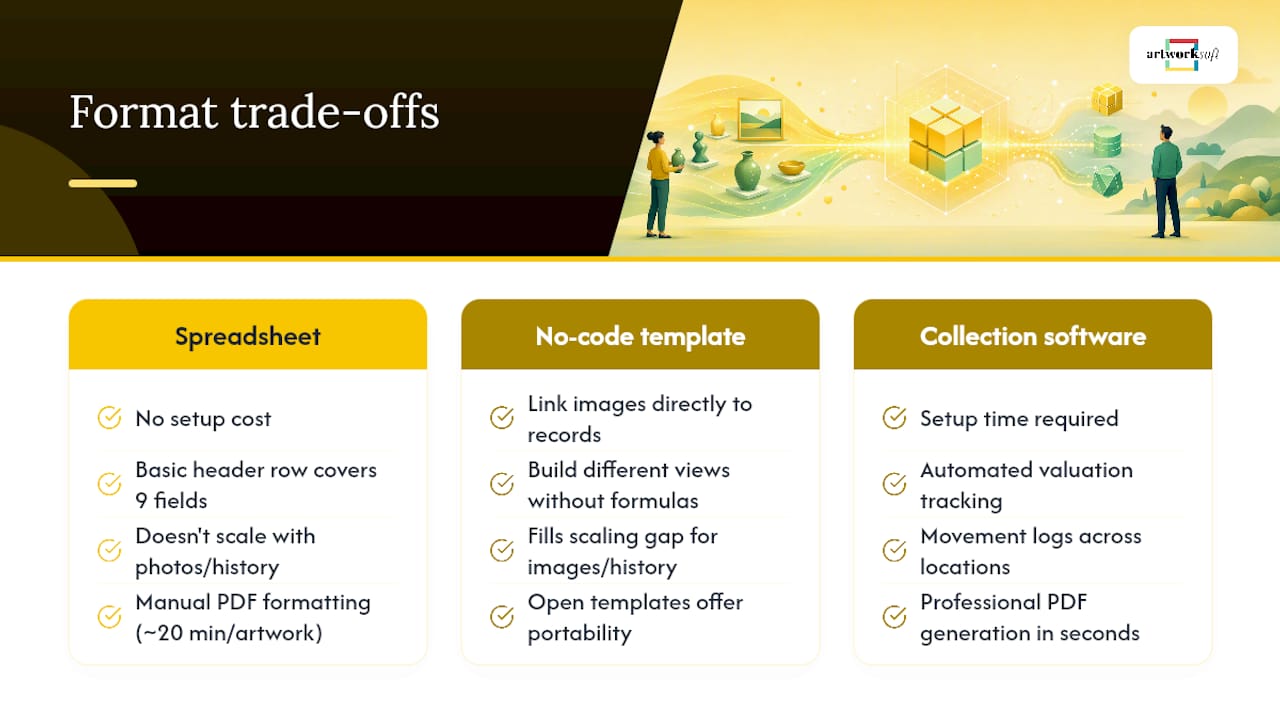
No-code database templates fill that gap. Airtable’s art collection template and Notion’s art collection database both let you link images directly to records and build different views (by artist, by value, by location) without touching formulas. Open template options like Craft’s art collection template offer similar structure with easy portability if you later switch platforms.
Dedicated collection management software earns its cost once you need automated valuation tracking, movement logs across multiple locations, or professional PDF generation for buyers and insurers on demand. The trade off is setup time against speed later. A one-artwork-per-page export that would take twenty minutes to format manually in a spreadsheet generates in seconds from a collection management system.
Whatever format you pick, confirm you can export raw data as CSV. That single feature protects you from vendor lock-in and means switching tools later never means re-entering years of records by hand.
Writing the Analysis Section and Recording Outcomes
Every strong report includes a short interpretive paragraph beyond the raw fields, and it follows a reliable three-part pattern:
- Provenance and context: where the piece came from and why that history matters (a notable prior owner, a documented exhibition, or a gallery of record).
- Artistic significance: the piece’s place in the artist’s body of work or a movement, kept to two or three sentences for most audiences.
- Practical outcomes: what has happened to the piece since acquisition, stated plainly.
Keep the tone factual for insurers and lenders, since they want verifiable claims, not curatorial language. For curators or grant applications, a slightly longer artistic-significance paragraph is appropriate, matching the depth the NEA’s final reporting guidance expects from award recipients documenting funded work.
Log outcomes as they happen rather than reconstructing them later: sale price and date, exhibition dates and venue, loan periods and borrowing institution, conservation interventions, and any documented change in condition. A sample outcomes line might read: “Loaned to [Venue], March through June 2025; no condition change noted on return; re-appraised October 2025 at $18,500, up from $14,000 in 2022.”
Common Mistakes That Undermine a Collection Report
Weak acquisition paperwork is the most common gap, and it’s the first thing an insurance adjuster or buyer’s attorney checks. A report with no invoice, no seller name, and no purchase date reads as unverified, regardless of how detailed the rest of the entry is.
- Skipping acquisition documents or leaving provenance entries vague instead of noting exactly where the gap is.
- Photographing pieces inconsistently, with no fixed naming convention across the collection.
- Failing to log movement, loan, or condition changes as they occur rather than reconstructing them from memory later.
- Relying only on a paper ledger with no digital backup anywhere.
- Omitting the valuation source and date, so a number on the page can’t be verified or updated.
Pro Tip: If you can’t remember why a value on your report is what it is, an appraiser reviewing it can’t either. Attach the valuation source every time you update a number, not just the first time.
When to Bring in a Professional
Hire a registrar, conservator, or appraisal writer when the stakes go beyond routine recordkeeping: a high-value sale, a legal dispute over ownership, or a grant or exhibition application requiring formal documentation. Outside expertise also matters for authentication questions a collector can’t resolve alone.
- Brief the professional clearly: who will read the final report (insurer, court, curator), what attachments already exist, and the deadline.
- Specify whether new research is required (provenance gaps, attribution questions) or whether the brief is purely a write up of existing records.
- Vet candidates by asking for prior work samples and checking conservator credentials through a recognized body before signing on.
Templates and Guidance Ready to Use Now
You don’t need to build every field from scratch. The Met’s sample documentation templates offer museum-tested field lists, while Artworksoft’s 7 Steps to a CCI Art Condition Report guide walks through building the condition section step by step, mapped directly to the fields covered above.
- Download a condition report guide built around CCI (Canadian Conservation Institute) standard practice.
- Reference museum-grade field lists for artist data and provenance formatting.
- Start a free account to export completed reports as branded PDFs without manual formatting.
Completeness Versus Maintainability for Small Collections
Small collections don’t need every field perfected on day one. Prioritize sharp photos, solid acquisition proof, and a searchable inventory ID first. Everything else, condition detail, formal appraisal language, can be added later. What actually fails collectors is skipping the annual review, not skipping a field. Set a reminder for reappraisals and revisit the master index once a year.
— Nealda
Put This Format to Work Without Building It From Scratch
Some art management software solutions organize artwork metadata, provenance, condition, valuation, and attachments into a single record instead of relying on separate spreadsheets and folders. Spreadsheets often require manual rebuilding of one-artwork PDFs for insurers or buyers, whereas some software can generate such reports on demand, including location and movement history.

The Free Plan lets you set up your first entries and confirm the fields fit your collection before committing to anything paid. If your collection has outgrown manual entry, the Provenance Plan starts at $5 per month and adds branded documentation and deeper analytics. Collections or galleries that need help migrating existing records can use the Onboarding & Collection Management Service to get the structure right from the start. Start with the free plan and export your first report today.
Sources
- NEA — Awards to organizations: final reporting
- The Met — Sample documentation and templates for artists
- LegalClarity — Art inventory template: fields, docs, and tax records
FAQ
How Do You Document an Art Collection?
Assign each piece a unique inventory ID, record the core fields (artist, title, medium, dimensions, provenance, valuation), and attach photos plus acquisition and condition documents to every entry.
What Is the 70/30 Rule in Art?
Definitions vary by context. In collecting circles, it’s sometimes used informally to suggest a collection should lean toward pieces bought for personal enjoyment over pure investment, but there’s no single authoritative source establishing this as a formal standard.
What Is the 80/20 Rule for Artists?
This is commonly cited as a version of the Pareto Principle applied to art careers, meaning roughly 80% of an artist’s sales or recognition often comes from around 20% of their body of work, though exact figures vary by artist and market.
What Is the Best Format for an Art Portfolio?
For collection documentation specifically, a one-artwork-per-page structured report with attached images and provenance works best because it’s easy to share individually with insurers, buyers, or lenders without exposing the full collection index.
Can Artworksoft Generate These Reports Automatically?
Yes. Artworksoft is built to organize artwork metadata, provenance, valuation, and condition data into a single record and export it as a formatted PDF, matching the structure described throughout this article.